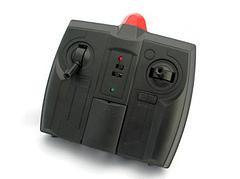
I am often the recipient of many broken toys, appliances, computers, and whatnot. Usually people are hopeful that I will fix their broken widget and return it to them, which I do when possible... but more often than not, I am given something that cannot be fixed. Such has been the case with many indoor toy helicopters - I have a few that I have purchased (which all still work), but I have also been given several that have been crashed badly enough to have broken some extremely small piece of plastic and cannot be repaired. While there is not a whole lot that one can do with a broken micro-helicopter that only costs $35 brand new, the infrared remote controller that came with the helicopter is almost always unscathed - thus I have about 6 of these laying around my workshop. If you have one of these IR controllers, you might be wondering what it could be used for... I am here to answer that question. With an Arduino and a cheap IR sensor from Radio Shack, you too can use the IR remote from your broken toy helicopter to control a robot or anything else where a line-of-sight control would be ideal. While some IR remotes might not work (without some code modification), I have 3 different types that all use the same protocol, so it is at least worth a shot.
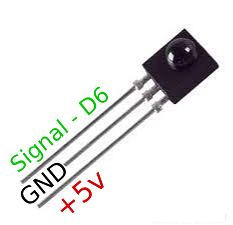
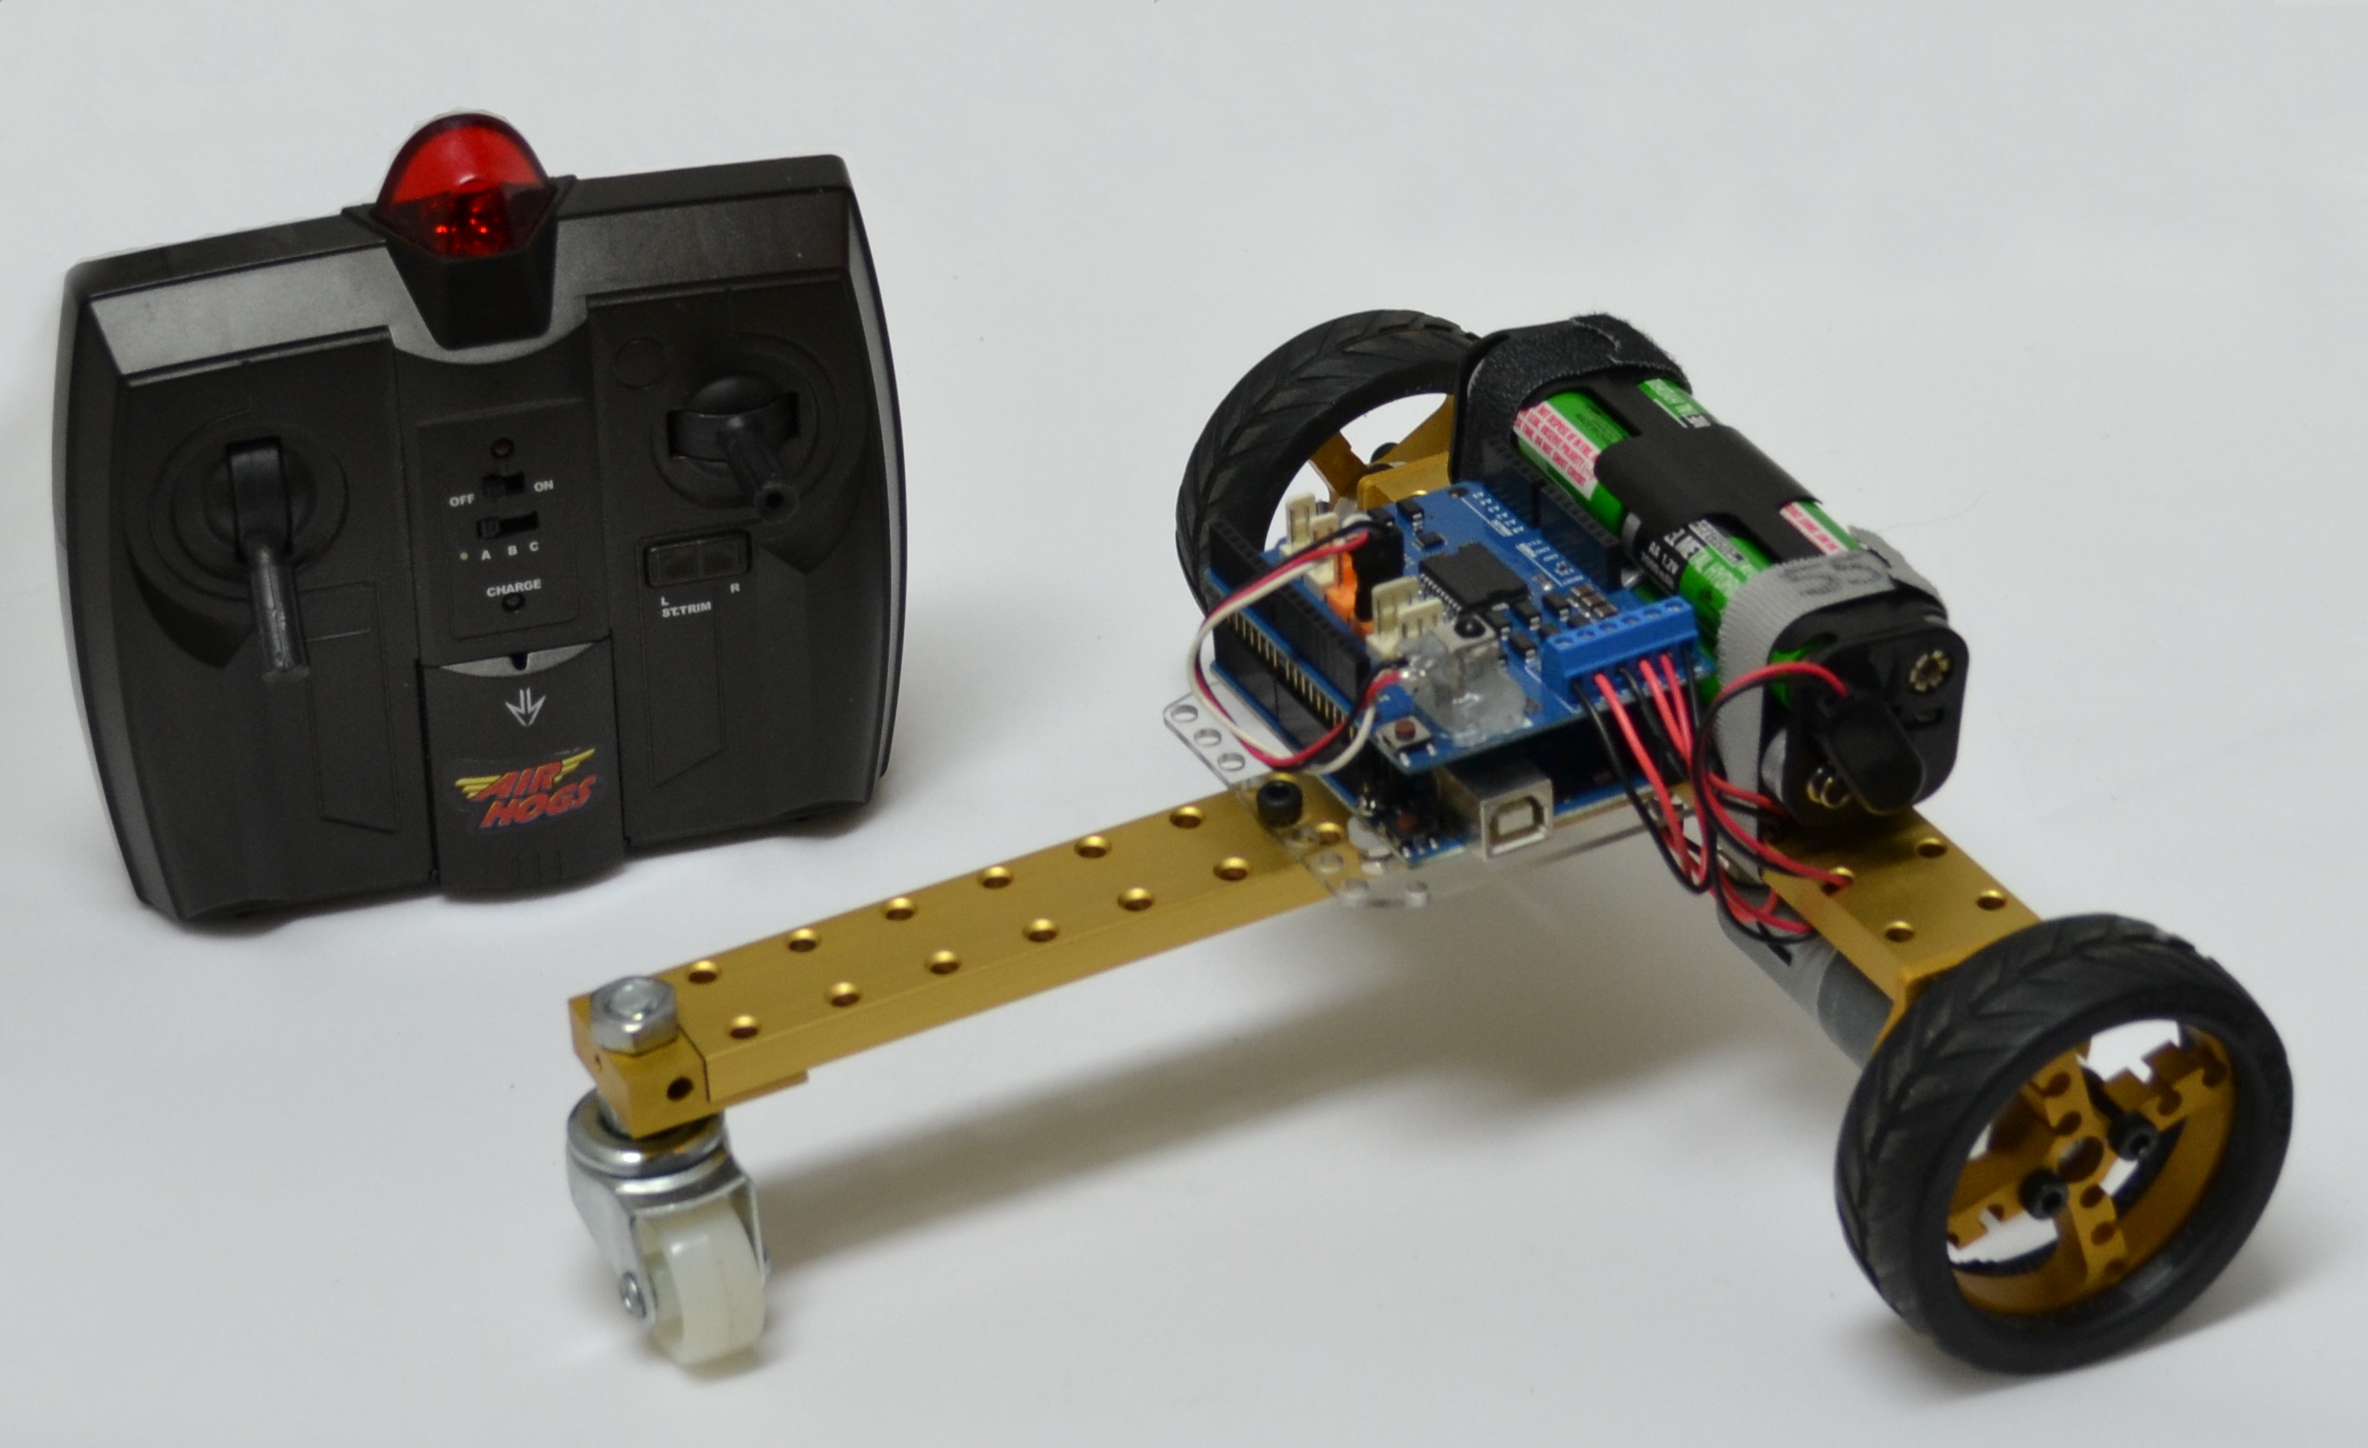
While I won't go into too much detail here about how to read infrared signals (maybe later), you can read them with an Arduino on any of the digital pins by calculating the length the pulses that are sent from the remote. The sensor to read the infrared signals only costs about $4 and can read an infrared signal from nearly any infrared remote. Most infrared remotes (like the from your TV) will output a series of 10-20 pulses of infrared light each time a button is pressed - and these pulses are converted by the IR sensor, which can be read by the Arduino and converted into useful codes. The infrared helicopter remotes are similar but instead output a constant stream of pulse sets that allow for continuous control of a robot. I have several of these remotes from different manufactuers - one from Brookstone, one AirHogs, and another unlabeled, but all have a channel for throttle (up/down), steering (left/right), a button with 2 functions and a 3-position mode selector switch. If your remote has these same functions, it is likely that it will work with this code.
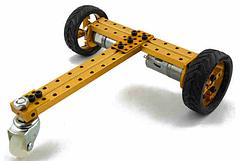
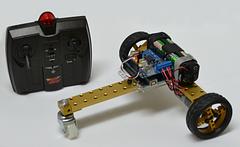
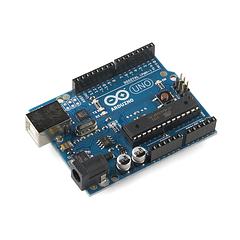
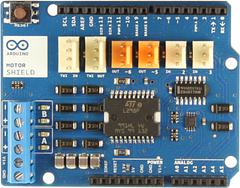
We will use the Arduino to read these sets of codes to determine how fast and in what direction the robot should go. You can upload the code for this project and connect your IR sensor to digital pin D6 on your Arduino to start reading the signals. If you have an old toy car or robot base that you would like to control, you will need a motor-controller - I used an Arduino motor-shield that utilizes the L298N dual 2amp motor driver IC. You will need a differential (tank-steering) drive base for this code to work unmodified, I used the MakeBlock robotics base kit to test on.
// This code is intended to decode an Infrared remote using a standard Infrared receiver from Radio Shack
// This code for use with an infrared helicopter remote
// This code is tested on an Arduino Uno R3
// Connect the IR detector input pin to Arduino D6
// MakeBlock robot kit with Arduino Motor-shield R3 (L298P) - tank drive steering
// JDW 2012

// create variables for pulse, boolean values, loop cycle counter, and the String object that we will use to hold the Infrared code.
int pulse_pin = 6; // connect IR receiver - I used pin 6, but you can change this, any digital pin will work (I had issues using Analog pins).
int pulse_val = 0; // create a variable for the pulse values from the IR detector
boolean reading = false; // a variable to check and see if the last available pulse was recently - a boolean variable can only be either true or false
int loop_counter = 0; // counter to check number of loop cycles since we last received a pulse from the IR receiver
String IRstring = ""; // initiate an empty String object to hold boolean values
int string_length = 20; // the total number of characters in each string (observed on serial monitor)

// make variables to hold speed, turn, and motor pwm values
int speed_val = 0;  // variable to hold the overall speed value
int turn_val = 0;  // variable to hold the overall turn value
int m1_val = 0; // variable to hold the final speed value for motor 1
int m2_val = 0; // variable to hold the final speed value for motor 2

// set variables for motor control pins
int m1_dir = 12;  // motor 1 direction
int m1_pwm = 3;   // motor 1 speed (motor 1 enable pin)
int m2_dir = 13;  // motor 2 direction
int m2_pwm = 11;  // motor 2 speed (motor 2 enable pin)

// speed codes are contained in indexes 7, 8, 9, & 10 of the IRstring
// these codes were observed on the Serial monitor and written down in order.
// I observed that even though these codes are binary, they are still in ascending order: 0000 < 0010 < 0011 < 0100 etc... coincidence?
String speed1 = "0000";
String speed2 = "0010";
String speed3 = "0011";
String speed4 = "0100";
String speed5 = "0101";
String speed6 = "0110";
String speed7 = "0111";
String speed8 = "1000";
String speed9 = "1001";
String speed10 = "1010";
String speed11 = "1011";
String speed12 = "1100";
String speed13 = "1101";
String speed14 = "1110";

// turning codes are contained in indexes 15, 16, & 17
String left1 = "111";
String left2 = "110";
String left3 = "101";
String right1 = "001";
String right2 = "010";
String right3 = "011";

// button codes are contained in indexes 11, 12, and 13
String button_left = "1111";
String button_right = "0001";


void setup() {
  // start serial monitor at 9600 bits per second and then print a test message
  Serial.begin(9600);
  Serial.println("Serial transmission begin");
  // declare input pulse signal from infrared remote as an input
  pinMode(pulse_pin, INPUT);
  // Create motor outputs from variables above
  pinMode(m1_dir, OUTPUT);
  pinMode(m1_pwm, OUTPUT);
  pinMode(m2_dir, OUTPUT);
  pinMode(m2_pwm, OUTPUT);
}

void pulse(){
  // use the pulseIn() function to check the length of each HIGH pulse from the pulse_pin, allowing 20mS before moving on.
  pulse_val = pulseIn(pulse_pin, HIGH, 20000);
}

void booleanize(){
  // this function changes the pulse readings of 500 microseconds and 1100 microseconds into 0 or 1 boolean values (respectively).
  // since we only have 2 pulse lengths to measure, 0 and 1 are easier to work with.
  if (pulse_val > 750){
    pulse_val = 1; // if pulse value is above 750 microseconds, assume this is a boolean 1
  }
  else {
    pulse_val = 0; // if pulse value is below 750 microseconds, assume this is a boolean 0
  }
}

void loop() {
  // get a pulse reading from the IR sensor
  pulse();
  // now check to see if it is a valide pulse was read (any pulse greater than 0 microseconds)
  if (pulse_val > 0){
    reading = true; // if so, assert that we are reading a pulse (so we will later know when the pulses stop)
    booleanize(); // convert each current pulse into a boolean 0 or 1
    IRstring += pulse_val; // append each new value to a string data object instead of an array. The same as: IRstring = IRstring + pulse_val;
    loop_counter = 0; // since we just read a pulse, reset the pulse counter to 0. We don't need this until we have stopped reading pulses.
  }
  // else if the pulse is not greater than 0...
  else {
    // if this is the first non-pulse loop cycle after a set of pulses, go ahead and close out the string
    if (reading == true){
      // OK, we have the end of a signal. Now let's check to make sure the resulting IRstring is long enough (I counted 20 values per string)
      if (IRstring.length() >= string_length){
        // if the string we just got is the appropriate length, let's get moving!
        // check speed value
        decode_speed();
        // check for turn
        decode_turn();
        // check for button
        decode_button();
        // check and limit the signal so no bad value is written to the H-bridge (make sure it is between -255 and 255)
        limit_signal();
        // finally, write the values to the motors
        write_motors();
      }
      Serial.println(IRstring); // Now print the full String to the Serial monitor
      IRstring = "";  // and set the string object to be empty "", so we can start over
    }
    reading = false; // since we are no longer reading a pulse anymore, set the reading value to false
    loop_counter++; // increment the loop counter by adding 1 to it
    // check to see if the loop count has reached 100 cycles without receiving a pulse signal
    if (loop_counter > 100){
      // at this point, it has been 100 loop cycles (a second or so) without receiving an IR signal
      m1_stop(); // so we need to stop both motors
      m2_stop(); // to keep the robot from driving off into the sunset without us
      loop_counter = 0; // also, since we have stopped the robot, we can reset the loop counter
    }
  }
}

void decode_speed(){
  // check the values of indexes 7 through 10 of IRstring to see if they are equal to any of the recorded speed values (speed1-14)
  // Arduino PWM max speed value is 255, I measured 14 speed values (steps).
  // 255/14 = 18.2, so I started at PWM 0 with speed1 and incremented by 20 (rounded up from 18.2) for each speed step until reaching PWM 255 with speed14.
  // if the string cannot match any of the recorded values, set the speed value to 0 PWM (stop).
  if      (IRstring.substring(7,11) == speed1){speed_val = 0;}
  else if (IRstring.substring(7,11) == speed2){speed_val = 20;}
  else if (IRstring.substring(7,11) == speed3){speed_val = 40;}
  else if (IRstring.substring(7,11) == speed4){speed_val = 60;}
  else if (IRstring.substring(7,11) == speed5){speed_val = 80;}
  else if (IRstring.substring(7,11) == speed6){speed_val = 100;}
  else if (IRstring.substring(7,11) == speed7){speed_val = 120;}
  else if (IRstring.substring(7,11) == speed8){speed_val = 140;}
  else if (IRstring.substring(7,11) == speed9){speed_val = 160;}
  else if (IRstring.substring(7,11) == speed10){speed_val = 180;}
  else if (IRstring.substring(7,11) == speed11){speed_val = 200;}
  else if (IRstring.substring(7,11) == speed12){speed_val = 220;}
  else if (IRstring.substring(7,11) == speed13){speed_val = 240;}
  else if (IRstring.substring(7,11) == speed14){speed_val = 255;}
  else    {speed_val = 0;}

  // set both m1_val (motor 1) and m2_val (motor 2) equal to the speed_val we just set above
  m1_val = speed_val;
  m2_val = speed_val;
}

void decode_turn(){
  // check for a turn code (there were 6 unique codes on my remote)
  // 3 steps in each direction
  if (IRstring.substring(15,18) == left1){
    // turn left slightly (left1)
    m1_val = speed_val / 2;
    m2_val = speed_val;
  }
  else if (IRstring.substring(15,18) == left2){
    // turn left moderately (left2)
    m1_val = 0;
    m2_val = speed_val * 2;
  }
  else if (IRstring.substring(15,18) == left3){
    // turn left extremely (left3)
    m1_val = -speed_val;
    m2_val = speed_val;
  }
  else if (IRstring.substring(15,18) == right1){
    // turn right slightly (right1)
    m2_val = speed_val / 2;
    m1_val = speed_val;
  }
  else if (IRstring.substring(15,18) == right2){
    // turn right moderately (right2)
    m2_val = 0;
    m1_val = speed_val * 2;
  }
  else if (IRstring.substring(15,18) == right3){
    // turn right extremely (right3)
    m2_val = -speed_val;
    m1_val = speed_val;
  }
  else    {
    // otherwise, do nothing to the speed values
  }
}

void decode_button(){
  // check button to see if being pushed
  // if so, we will use this for reverse by making the speed value negative
  if (IRstring.substring(11,15) == button_left){
    // left button was pushed.. we are not currently checking for the right button
    m1_val = -m1_val; // set the current speed value for each motor negative
    m2_val = -m2_val; // setting the value negative, makes that motor go in reverse
  }
}

void limit_signal(){
  // this is just a function to check each motor value and make sure neither exceeds +/-255
  // if either value does, set it to the max of +/-255... we don't want any sporadic values sent to the motor-controller
  if (m1_val > 255){ m1_val = 255; }
  else if (m1_val < -255){ m1_val = -255; }

  if (m2_val > 255){ m2_val = 255; }
  else if (m2_val < -255){ m2_val = -255; }
}


void write_motors(){
  // check direction of m1_val and write appropriately
  if (m1_val > 0){
    m1_forward(m1_val); // if m1_val is above 0, we are going forward using m1_val to set the PWM duty-cycle (motor speed)
  }
  else if (m1_val < 0){
    m1_reverse(-m1_val); // if m1_val is below 0, go reverse using -m1_val (which will now be a positive number) to set the PWM duty-cycle.
  }
  else {
    m1_stop(); // otherwise, stop this motor
  }
  // check direction of m2_val and write appropriately
  if (m2_val > 0){
    m2_forward(m2_val); // if m2_val is above 0, we are going forward using m1_val to set the PWM duty-cycle (motor speed)
  }
  else if (m2_val < 0){
    m2_reverse(-m2_val); // if m2_val is below 0, go reverse using -m1_val (which will now be a positive number) to set the PWM duty-cycle.
  }
  else {
    m2_stop(); // otherwise, stop this motor
  }
}


// motor functions for Arduino Motor-shield Motor R3
void m1_forward(int pwm_speed){
  digitalWrite(m1_dir, HIGH); // set the direction pin HIGH
  analogWrite(m1_pwm, pwm_speed); // set the speed using the variable passed in from m1_val as the pwm speed: m1_forward(m1_val);
}
void m1_reverse(int pwm_speed){
  digitalWrite(m1_dir, LOW);
  analogWrite(m1_pwm, pwm_speed); // set the speed using the variable passed in from m1_val as the pwm speed: m1_reverse(m1_val);
}
void m1_stop(){
  // stop this motor by writing the Enable pin LOW
  digitalWrite(m1_pwm, LOW);
}
void m2_forward(int pwm_speed){
  digitalWrite(m2_dir, HIGH);
  analogWrite(m2_pwm, pwm_speed); // set the speed using the variable passed in from m1_val as the pwm speed: m2_forward(m2_val);
}
void m2_reverse(int pwm_speed){
  digitalWrite(m2_dir, LOW);
  analogWrite(m2_pwm, pwm_speed); // set the speed using the variable passed in from m1_val as the pwm speed: m2_reverse(m2_val);
}
void m2_stop(){
  // stop this motor by writing the Enable pin LOW
  digitalWrite(m2_pwm, LOW);
}
I mentioned that the Arduino reads the signals and converts them into codes.... if you are interested to know that the codes do, you can check out this spreadsheet with the data that I recorded from reading the serial monitor while fiddling with the remote.
Image Gallery