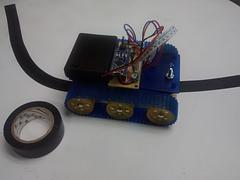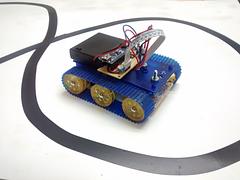
Back in 2010, I built Linus the linebot for my book Arduino Robotics. Since most of my robots are larger, I enjoyed playing with Linus as you can test him out on your living room floor with some electrical tape, which made updating and trying new code easy and fun. Also, my toddler likes playing with anything that moves, so it is fun to make tracks and let her chase it around.
I wanted to revamp my original design, so I basically began following the instructions from my book and came up with a new, simpler variant.
I started by using the same code but some different motors to make sure it still works the same. It does work, but I soon realized that the code was in need of refactoring. So, I refactored a few times and came up with a simplified version of the original that works just as well.
Parts:
(1) Robot Tank Kit - $7
(1) 4 AAA battery holder - $2
(2) N-channel MOSFETs - $1.50
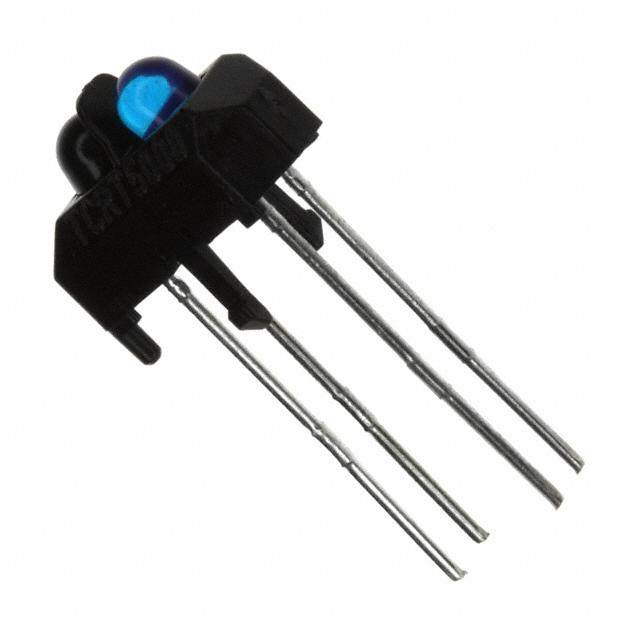
(3) Infrared sensors (emitter/detector) - $4
(1) Arduino Nano - $5
(1) piece of perforated prototyping board - $2
(4) 10k resistors - $0.40
(2) 1k resistors - $0.20
(2) 330 ohm resistors - $0.20
Total Cost = $22
Note: All parts are available from Radio Shack except the IR sensors (from Digikey), though other suppliers will be cheaper.
The Frame, Motors and Batteries
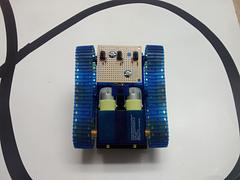
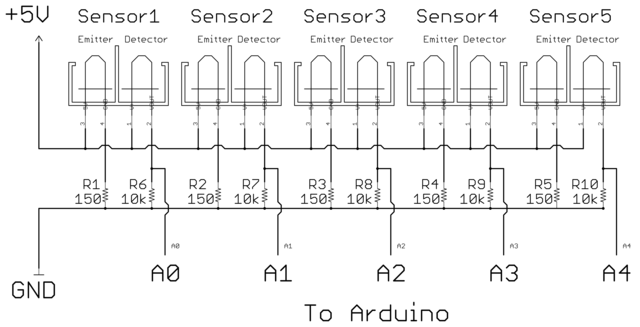
The main thing that I noticed when refactoring was that it works just as well to use only 3 IR sensors instead of 5... since I was really only reading the 3 center sensors to keep Linus on the black tape. Implementing the 3 sensor setup led me to build a completely new sensor board that is functionally the same as the original but only has 3 sensors.
For the frame, I decided to use a robot kit from Radio Shack. They were on clearance for $7 each, so I figured why not. The robot kit was designed to run on 4.5v (3 AAA batteries) and uses a pair of Solarbotics gear motors to move. It also came equipped with a neat little Infrared remote control and a receiver board that has 2 bi-directional motor controllers (H-bridges) built in. There was no speed control, speed for each motor is either On or Off, but that is not important since the motors are geared down so low... you pretty much want to go full speed all the time.

I decided to scrap the controller and board that came with it (will use on something else later), and just use this little tank for its motors and frame. The battery holder it came with was neat, but 4.5v would not run the Arduino properly, so I had to buy a (4) AAA battery holder from Radio Shack to get the voltage up to 6v. You could also use a 7.4v LiPo pack or NiMh or really anything above 5v - I went with simple. The battery holder I bought has a built-in power switch and was only a couple of bucks, so that was a bonus.
The Brains
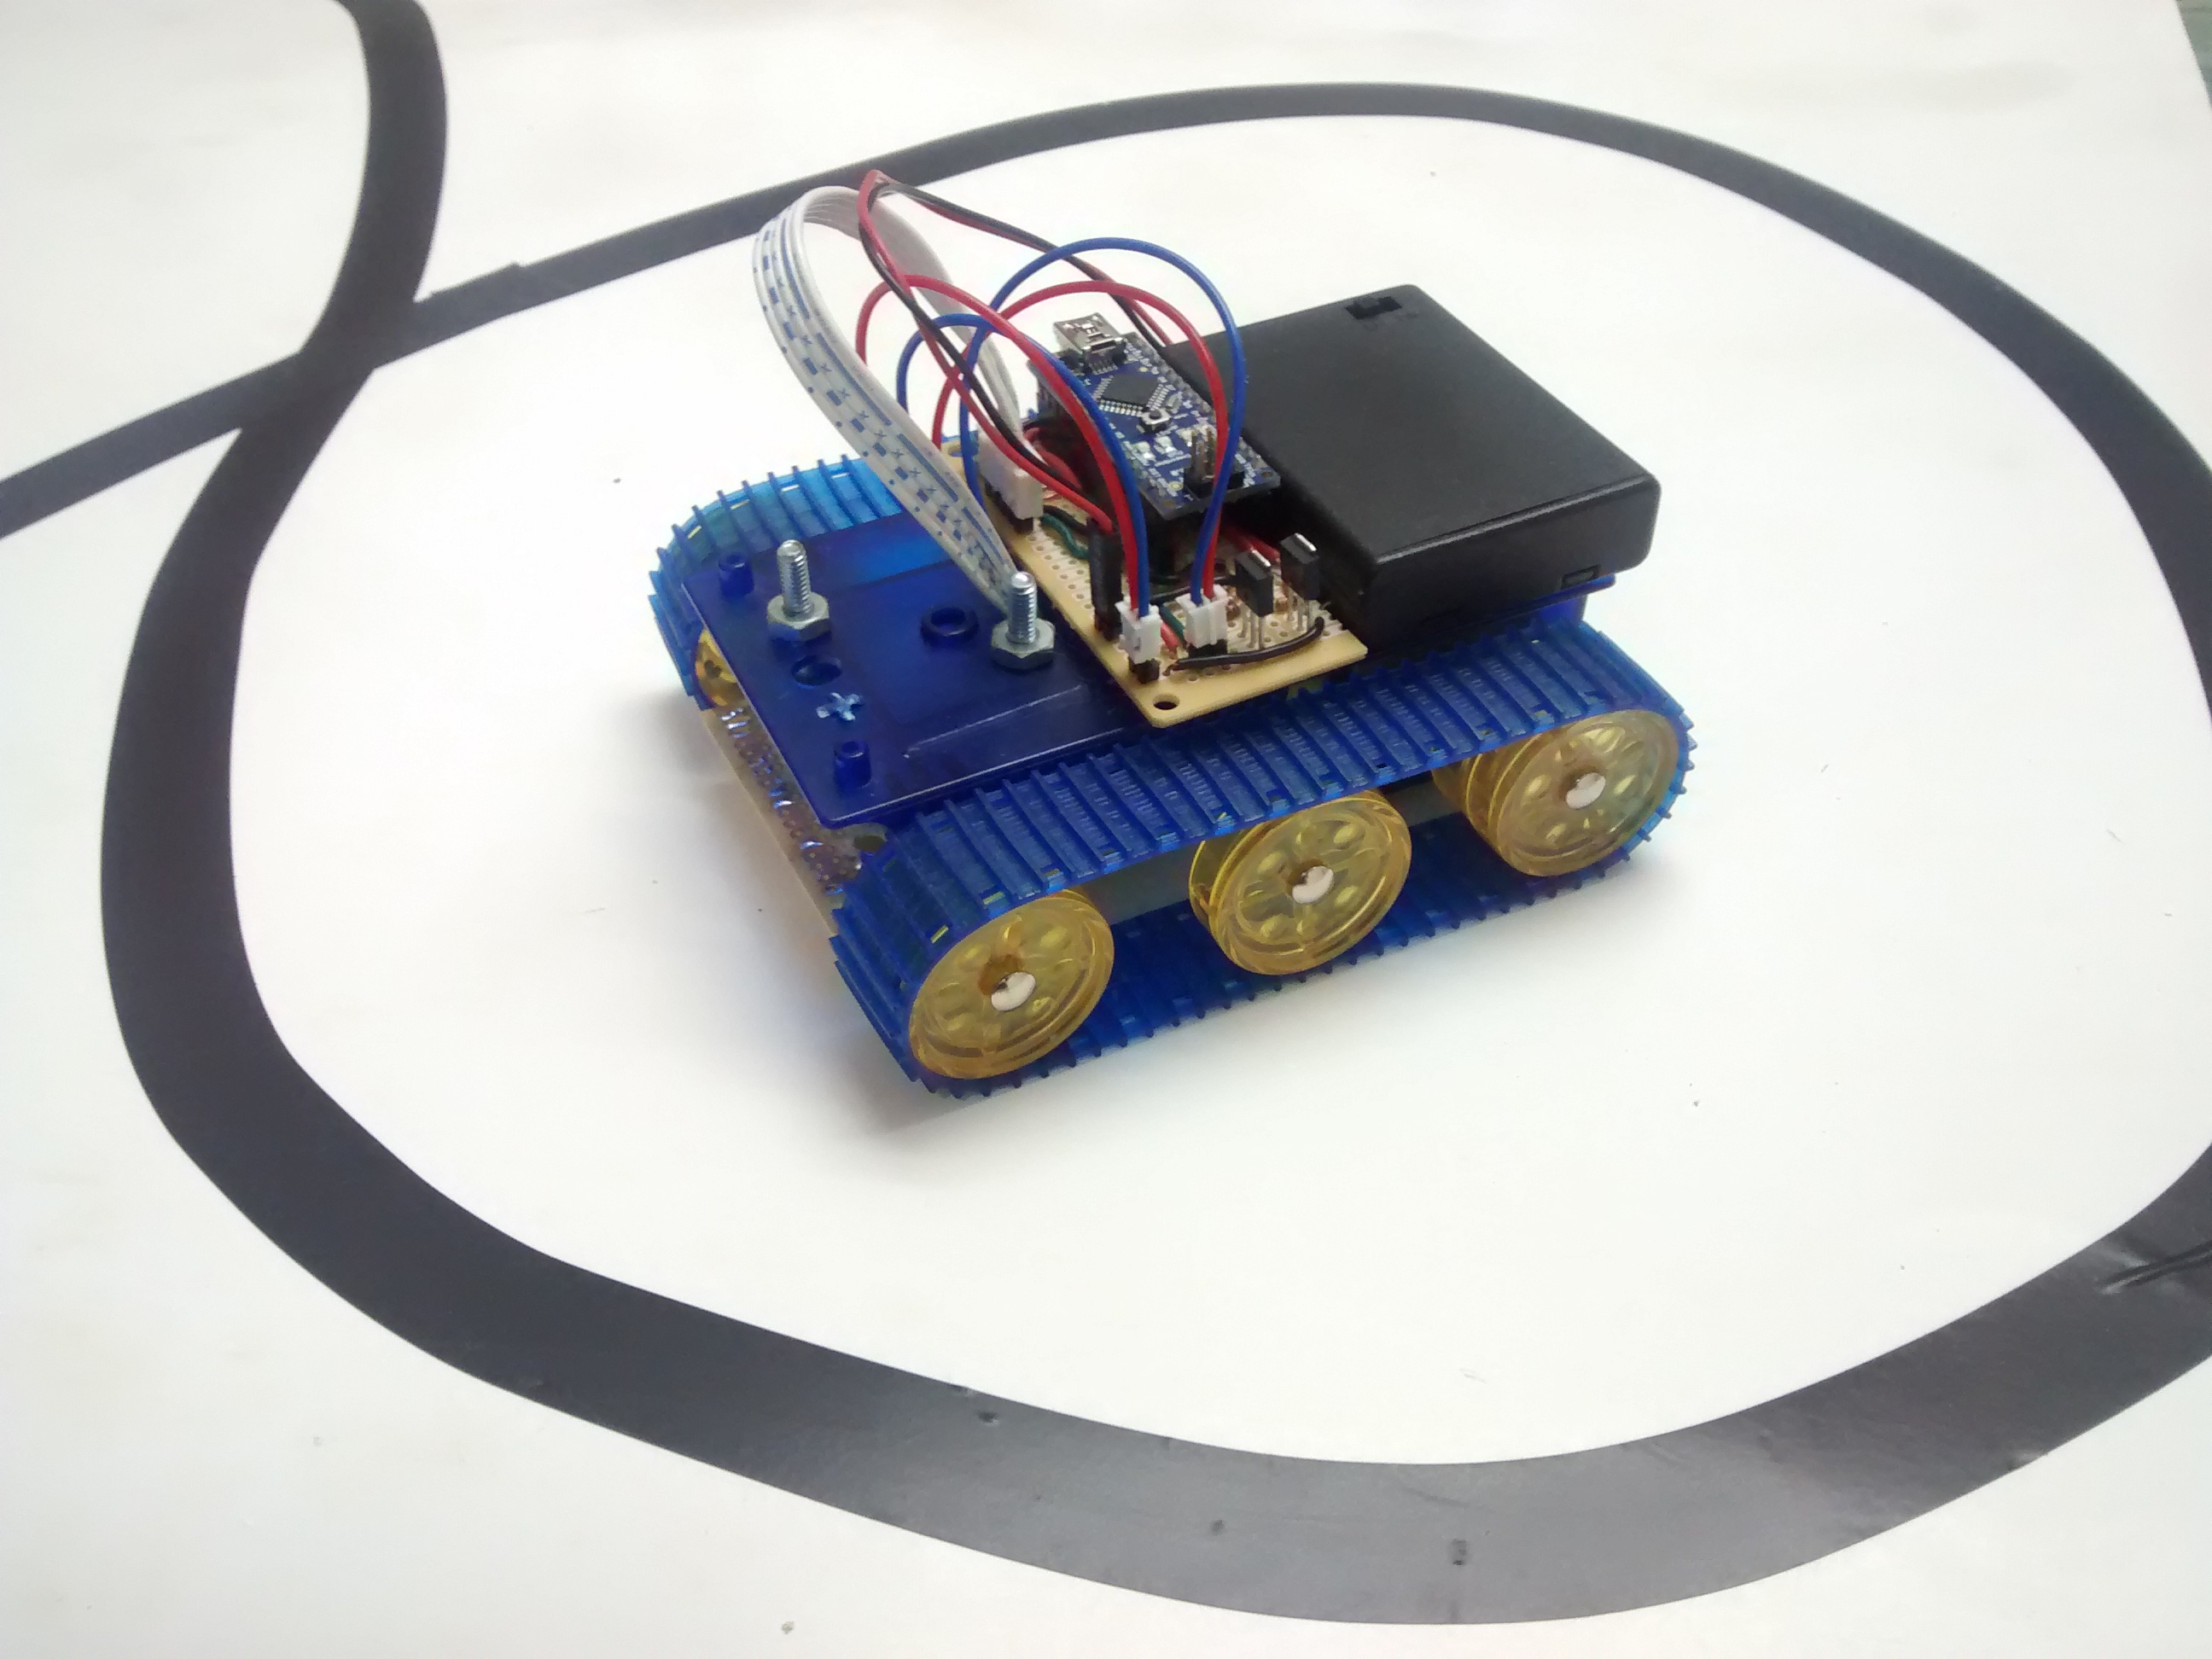
I used an Arduino Nano that I bought from Banggood.com for $5 (no, that was not a typo) - if you haven't yet heard of Banggood, then you have been paying too much for your Arduinos. They are based in China, but offer free shipping on everything I have purchased from them - the only catch is that it can take up to a few weeks to get your items. If you don't mind waiting, you can save a bunch of money.
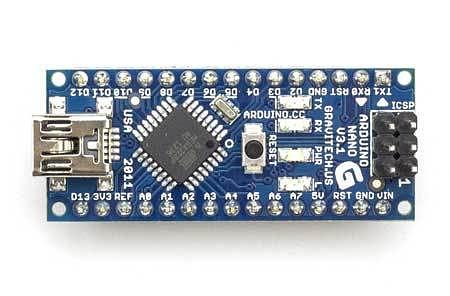
You can use any Arduino compatible board, I chose a Nano for its size and onboard USB controller - I can plug it directly into the computer using a mini USB cable. The full size Arduino was a bit large for this frame, and the Arduino Micro requires using a FTDI programming cable to connect to the computer to upload code and debug. I wanted easy.
The Motor Controller
As you might remember from Chapter 4 of my book, I offered 2 methods of controlling the motors on Linus.
First off, in the book I used servo motors which have built-in motor controllers that can be used - but the standard servo motors needed to be modified for continuous rotation. I also showed you how to remove the motor controllers and use an external controller like the Arduino motor shield.
This time around, I wanted everything to stripped down - so I didn't even use a full motor controller for this bot. As I thought more about the function of Linus, I realized that there is really no need for him to go in reverse... ever. He is supposed to follow a line going forward, that is it. So keeping this in mind, I decided to make him go forward only.
As you might guess, controlling a motor that only goes in one direction is super simple and cheap. You only need a single transistor per motor (BJT, MOSFET, etc..) to switch the power to 1 wire per motor , leaving the other connected all the time. This is most easily accomplished using a pair of N-channel MOSFETs controlled by the Arduino. I picked a cheap logic-level MOSFET that could handle 20A, even though the motors would only draw less than 1A of current. They were only $0.65 each so, $1.30 for the pair - pretty much any N-channel mosfet or NPN transistor will work here. To use an N-channel FET, you would connect the V+ wire of the motor to the V+ battery supply (+6v in my case) and run the GND wire of each motor through the MOSFET to be switched.
Why use Logic Level MOSFETs? Because normal MOSFETS are activated by supplying around 10v to the Gate pin but the Arduino only has 5v to work with without using a level shifter or amplifier. Logic Level FETs can be activated by supplying between 3v-5v to the Gate pin, making them ideal for connecting directly to an Arduino pin.
Though not technically required, I always use a low value resistor inline between the Arduino and MOSFET Gate pin (between 100 Ohm and 1k Ohm) to limit the amount of current supplied by the Arduino to the MOSFET (will not hurt anything if you don't use one). I also use a 'pull-down' resistor, usually around 10k Ohm connecting the Gate pin to GND to keep the MOSFET turned off when not being activated by the Arduino. The pull-down resistor is also not required, but you might notice some strange behavior if you don't use one (ie. motors not stopping exactly when they should) - this is because MOSFETs have built in capacitors... but we will save that for another discussion.
As I mentioned before, these motors are so slow moving that you don't really need to bother with speed control, though you can if you want. I connected the MOSFETs that control the motors to PWM pins on the Arduino just in case I decided to use it later. But for now, I am just using digitalWrite() to turn the motor pins On or Off.
I used a small piece of perforated prototyping board to solder the MOSFETs into place and added some header pins to plug the motor connectors onto. The prototyping board also provides a way to connect the Arduino motor control pins to the MOSFET gate pins, the battery pack to the Arduino, and the infrared sensors to the Analog input pins on the Arduino.
The Sensors
I used the exact same Infrared sensors (emitter/detector pair) from Digikey that I used in my book, though only 3 of them this time. They are about $1.26 each, so just under $4 for three of them. The wiring diagram is exactly the same as the one used on Linus, but again using only 3 sensors.
Once you wire the sensors up, you can check to make sure the IR emitters are working by turning the power On and looking at the emitter LED's through a camera (ie. your phone camera) and you should see htem light up through the camera screen, even though you can't see the light with your naked eye.
I also added a debugging option in the code so you can enter debug mode without reprogramming your Arduino. Simply ground pin D2 with a jumper wire, then plug Linus' Arduino into your computer via USB and it will write the IR values of each sensor to the serial monitor.
You should now connect pin D2 to GND and the Arduino to your computer to view the values on your serial monitor. I used a notecard with a piece of electrical tape down the center to test each sensor individually with. You should see a high value (probably around 900 or so) on your screen when you put the white card under each sensor. You should then see a low value (around 200 or so) when you pass the black electrical tape under each sensor.
Once you have verified that each sensor works, you should be ready to test it out.
As you can see from the video, the Infrared sensors work on other surfaces than white posterboard... like hardwood floors.
Here is a link to the new code (with comments):
Image Gallery