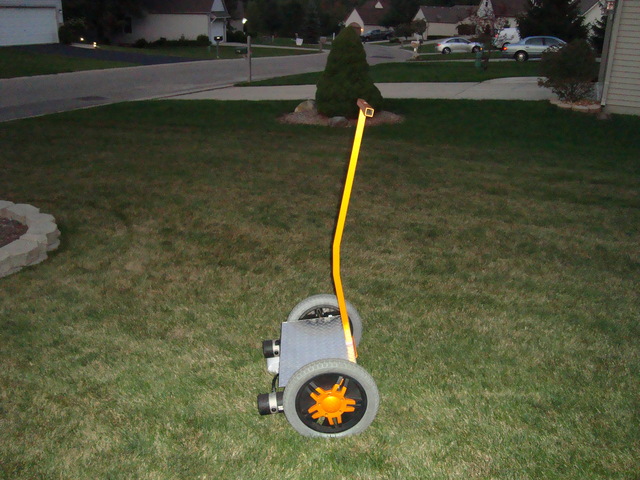
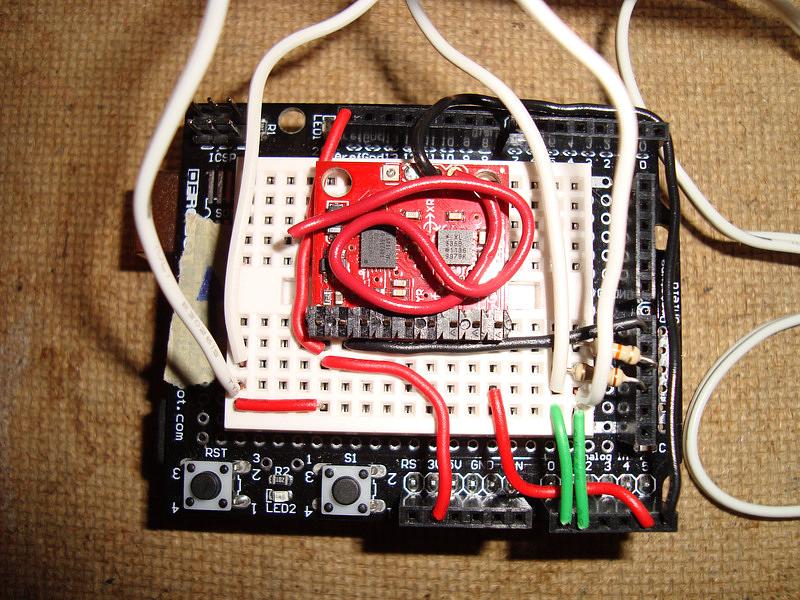
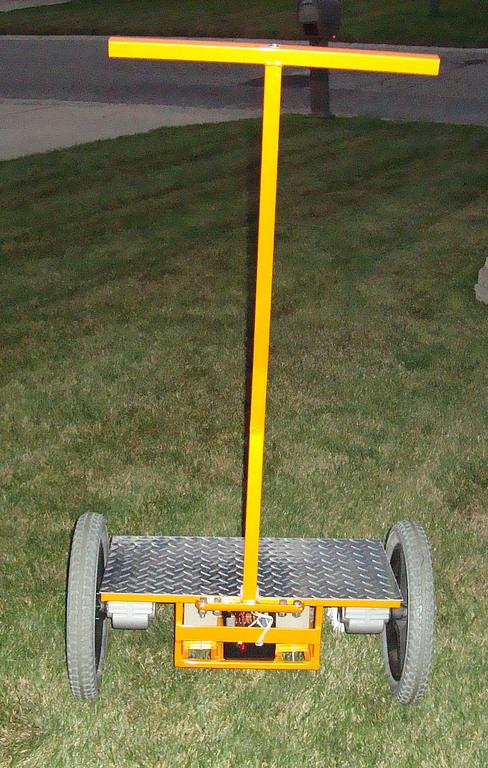
Here is my Segbot heavily based on JD Warren's Segbot from his book. I have made some changes which I felt would improve on an already great bot. I will detail those changes here. First thing I did, and you can probably see it, is installed the motors the opposite way JD did. My only reasoning was because I wanted more ground clearance to go up hills and such. It turned out to be a good thing for my purposes. My buddy has a backyard with about a 25-30 degree slope over grass and dirt. No problem with these motors. The next thing I did was try to figure out a different, not better, but different means of steering. I bought 2, .5" Force Sensing Resistors (FSR) and, using a pulldown resistor for each, used available ADC inputs A0 and A1on the UNO to calculate how hard you were pushing and to turn appropriately. It works great.
Steering FSR's
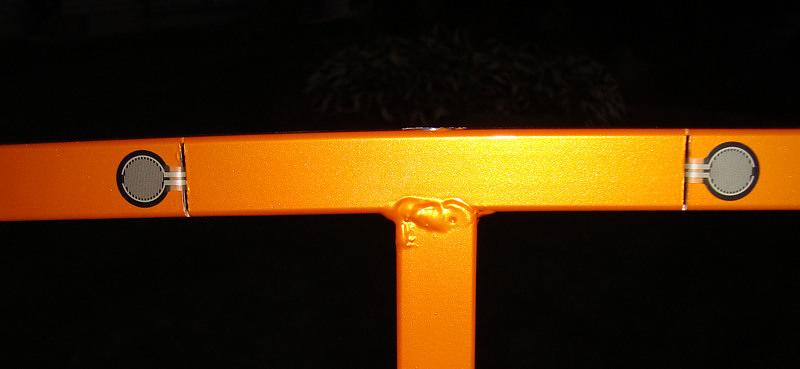
Steering FSR's wired in (white wire)
Other than this, the only other change, other than code, was to eliminate the engage button and gain pot. The gain pot was a no brainer for me. All out all the time! No need to slow anything down. The engage button took some thought. I see the value of having it. The Segbot won't move unless you have it pressed. Good in theory, but what if you are cruising down the road and you have to sneeze or something. You forget about the button and BAM! Face meets earth. That scared me. So I didn't do it. It also eliminated another button to add before I could ride it!
So my Segbot is coded a bit differently. First, no need to see if a button is pressed to engage and to check what the gain is set at, or if a max angle reading has been breached. Second, I included something similar to V3's calibration. I don't calibrate, I use the previously determined accelerometer and gyro readings as my level. But what I do do, is wait until the UNO sees the accelerometer value programmed before it even starts to move. This code was inspired by a co-worked hell bent on turning on the Segbot while sitting on its motors. If he would have done that, it would have went full speed backward. Now - it wouldn't do anything except look pretty until moved to level. Oh, and one more change. I don't let it go in reverse more than half speed. Didn't see the need.
OK, Finally figured out how to add multiple pics. Let's continue! JD's V3 software eliminates the need for the SoftwareSerial Library. I asked about that and he told me that some UNO users were getting loop times in the 70 mS range. I agree, that's no good. Again, my code differs from his by not putting the debugging stuff in it. I wrote 2 additional sketches that do that. One is for getting my accelerometer and gyro readings for level, and the other is for testing the steering FSR's. With these two pieces missing, and never having to call them, my loop has always been in the 50 mS range. I guess I could eliminate the SoftwareSerial Library and just use the usual Serial.print() stuff from pin D1, but it's all done and working. "If it ain't broke, don't fix it." That's what I always say.
One last comment. I have noticed that it is hard to keep the Segbot at full speed without falling over forward. I am guessing that it is a torque issue with the motor/wheel combinations that most of us are using. The "real" Segway uses servo motors which I am sure have much more torque to force you back at top speed. Any suggetsions or comments on that? I have gotten pretty good at keeping upright at top speed, but only through experimentation with different accelerometer and gyro readings.
Here are a few more pics. If anyone has any questions or comments, I'd love to hear them.
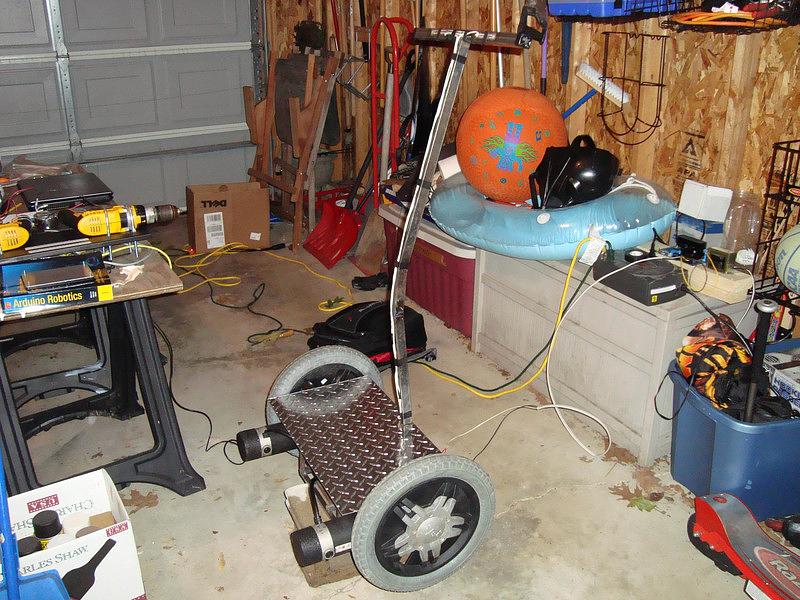
My unpainted Segbot (note JD's book, middle left!)
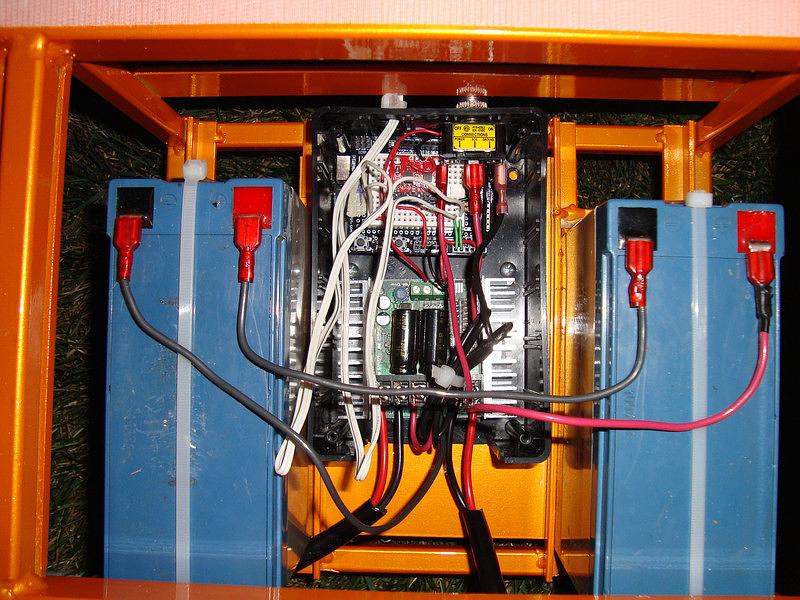
Electronics and Batteries
Closer view from up front
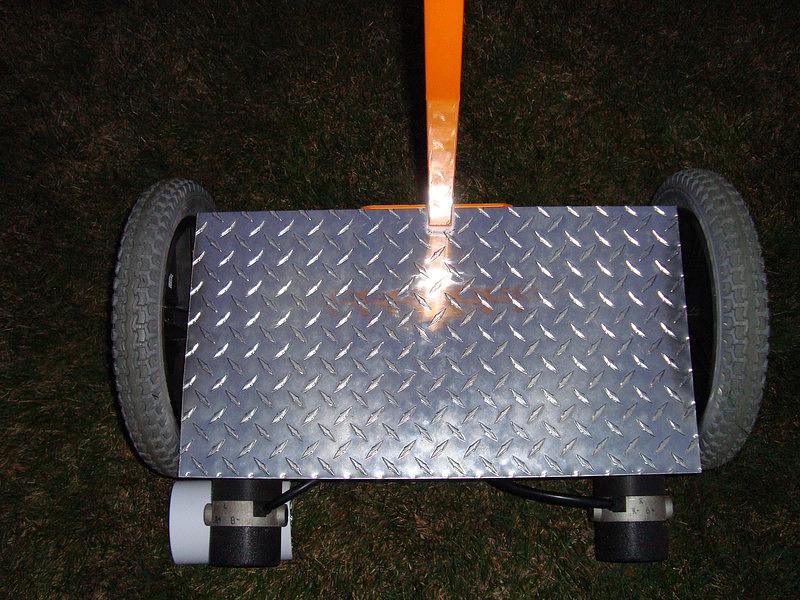
Aluminum Diamond Plated Platform
If you have any questions or comments, please post below!
Edited (10/26/2012) - Happy birthday to me! Anyway, it's coming up on Halloween here in the U.S. and I want to take my son Trick-Or-Treating while riding my Segbot. So, I made a couple of modifications. First, I added headlights (pics to come soon!). Not really headlights, but two small LED flashlights to the front of the main motor frame. Secondly, I live in a 300 house subdivision and my buddy agreed to carry an extra set of batteries, just in case. Well, my original zip-tie solution wouldn't work well for a quick battery change if needed, so I put foam on the bottom of the diamond plate directly above each battery to hold it in while I was riding, but would allow the batteries to be easily removed and replaced on the fly with freshly charged batteries to keep the candy coming!
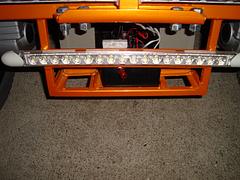
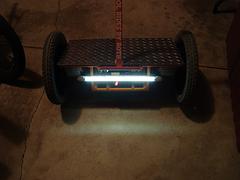
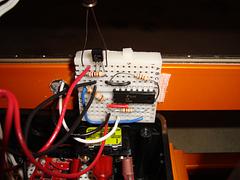
Edited (5/18/2013) - Ok, I've installed what I call "a real headlight" now. It is a 18 LED, 16" long LED strip from etrailer.com. It runs on 12VDC and I've added a circuit that automatically turns on the headlights when it gets dark! It's pretty cool and really lights the way. I'll add pics in a couple of days. OK, here are the pics in my gallery. Pics one and two are of the LED strip OFF and ON. The other pic is of the circuit used to turn it on or off depending upon the amount of light available. A LM339N comparator is used. It has four channels, so we are only using one of them. There is a Light Sensing Resistor (LSR) connected to the negative input (Pin 6) along with another resistor connected from the negative input to VCC. The resistor value will depend upon the LSR used. See this site for a great desription - http://home.cogeco.ca/~rpaisley4/PhotoDetectors.html. There are also 10K resistors from the positive input (Pin 7) to both ground and VCC. VCC is 12VDC because that is what the LED strip runs on. You'll also notice a 2n3904 transistor. This is what makes sure that the Segbot is actually powered up before the LSR does its magic. I took the 5VDC output from the Arduino Uno and sent it to the base, with a current reducing resistor of 1K and BAMMMM! Turn on the Segbot, it looks at the available light, and the LED strip is on or off depending upon darkness. Cool!! Let me know if you have any questions!
Image Gallery