Traffic Light
By: johndavid400
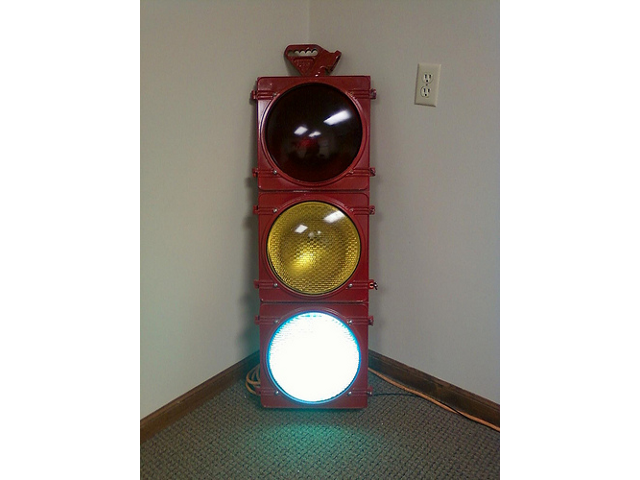
The traffic-light project is something we did at work (Isotope11) to monitor our software projects. We are a software development firm and we handle some large projects that have extensive test code written to make sure newly added features or changes to existing features can easily be tested by running the test code against the changes. If any one of the test scenarios fail on any project, our office traffic light will turn red. If any project is currently running tests, the yellow light will blink. Otherwise, while everything is good the light will be green.
Since Isotope11 is a Ruby on Rails development shop, we decided to use Ruby act as a middle man between the Arduino that was controlling the traffic light, and the Jenkins test server's API that serves up the success or failure data when requested. Using Ruby, we can make an api request to the test server, parse through the response and search for failures or current builds, then output a signal to the Arduino using a rubygem called "serialport". This lets the Arduino listen for a simple 1, 2, 3, or 4 depending on the API response, and then control the traffic lights accordingly.
Upgrades:
Recently, the traffic light received an upgrade as a result of complaints that the relays used in the original design were quite loud whenever a project was running its tests. To remedy the noise complaints, we decided to remove the relays altogether and replace the 120vac lamps with some more efficient LED lamps. The 120vac lamps that we used (even the lowest wattage bulbs) were hilariously bright and more or less lit up the entire room, which we all agreed was a bit overkill.
So when switching to LED's I wasn't sure just how well the light would reflect inside of the reflector cans, or how many LED's we were going to need to make them bright enough to see, but not too bright. My initial thought was to try to use a large single LED from Radio Shack in each socket powered by a 5v signal from the Arduino... but this was hardly noticeable and just not bright enough. Luckily, I built 3 transistor driven circuits to switch the 5v power supply from the Arduino to each LED, so adding more or upgrading was a simple plug and play operation.
The next idea was to replace the single LED in each can with an LED flashlight from Harbor Freight Tools which contain about 20 LEDs each. removing the small round circuit board from the end of each flashlight was easy enough, then I simply soldered the 5v/Gnd wires to contacts on the LED circuit board and we had light. These lights were bright enough through the yellow and green lenses, but still faint behind the red lens... but it will be upgraded soon enough.