This is actually an old board that I no longer use, but for those who still do, this is a reference page.
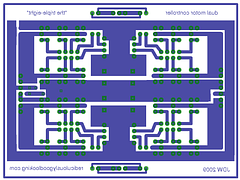
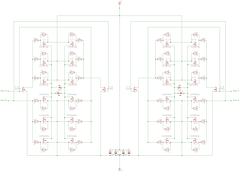
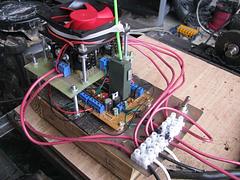
This is a motor driver board that can drive 2 DC motors in Forward or Reverse with full speed control (using an external PWM signal). It can handle at least 25 amps per channel continuously at 24vdc. I designed it using a basic H-bridge with 4 switches, 1 switch going to positive (+) and 1 switch going to negative (-) for each motor terminal. By switching 2 of the switches simultaneously (1 positive and 1 negative), you can change the polarity that is going to the motor which will in turn switch the direction.
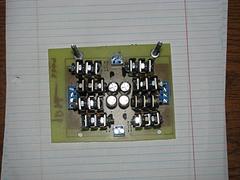
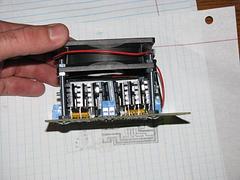
This board uses Mosfets for the switches because of their high-speed and low-loss capability and their ease of use. I used P-channel mosfets for the high-side (positive) switches and N-channel mosfets for the low-side (negative) switches. With mosfets, you can use 1 and operate it at it's rated current (in this case 50amps) or you can put multiple mosfets with their like-terminals tied together and multiply the amount of current the total circuit can handle, also allowing for more heat to be dissipated. So instead of using only the 4 mosfets needed to complete an H-bridge, I used 3 mosfets per leg of the H-bridge (3 mosfets per leg x 4 legs = 12 mosfets per H-bridge). Also, this board is a dual H-bridge, meaning there are 2 complete H-bridges, so it has 24 mosfets total on the board.
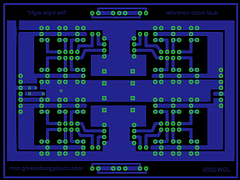
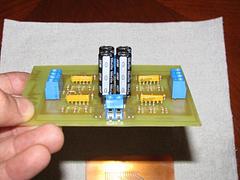
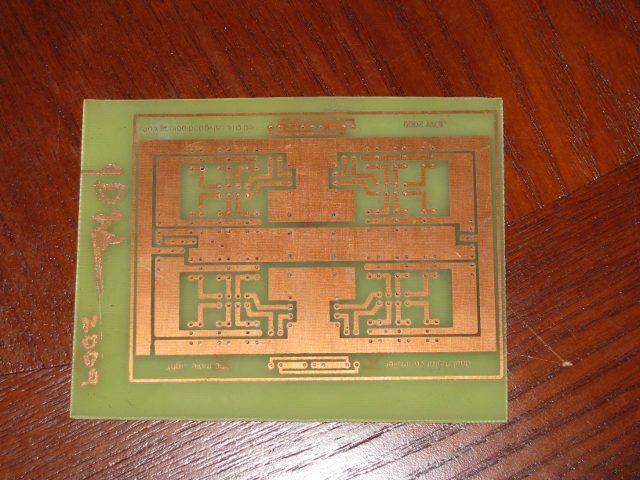
I etched the board using 2oz. copper clad from digikey. I used resistor networks instead of single resistors for each of the mosfets (they are the yellow things that look like mini-school busses below the mosfets). All the files you might want to see to make one yourself are included here. You will need Eagle Cad to print the files.
Parts List:
FQP47P06 P-channel Mosfet - Digikey - $1.73 ea. (x 12)
FQP50N06-L Logic level N-channel Mosfet - Digikey - $0.99 (x12)
47 ohm SIP-6 bussed resistor network - Digikey - $0.50 (x8)
2n7000 N-channel logic level Mosfet - Digikey - $0.45 (x4)
10k 1/8watt pull-up/down resistors - Digikey - $1.50 for 50pk (you only need 24)
2-position 5.04mm spacing terminal blocks - Radio Shack or Digikey - $2 for 2pk (x6 or (3) 2-packs)
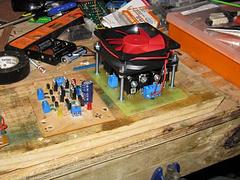
80mm 12v PC fan - Newegg - $2
various bolts and nuts 8mm
1 sided copper-clad 3"x5" 2oz.
FQP50N06-L Logic level N-channel Mosfet - Digikey - $0.99 (x12)
47 ohm SIP-6 bussed resistor network - Digikey - $0.50 (x8)
2n7000 N-channel logic level Mosfet - Digikey - $0.45 (x4)
10k 1/8watt pull-up/down resistors - Digikey - $1.50 for 50pk (you only need 24)
2-position 5.04mm spacing terminal blocks - Radio Shack or Digikey - $2 for 2pk (x6 or (3) 2-packs)
80mm 12v PC fan - Newegg - $2
various bolts and nuts 8mm
1 sided copper-clad 3"x5" 2oz.
Steps to build:
Step 1: Download the .brd and .sch files HERE. You might need to download EagleCad software to open the and print the files.
Step 2: Open the .brd file and print only the bottom layer. Use the "black" and "solid" options if not already selected.
Step 3: Prepare the copper clad by scrubbing it with a Scotch brite pad and cleaning it very throroughly with Acetone and paper towels (clean with acetone several times).
Step 3: Turn your iron on HIGH.
Step 4: Place the print face down on the copper clad board and place iron on top. Apply pressure and heat for about 3 minutes, moving every 30 seconds.
Step 5: Let copper board sit for a few minutes before placing it in a bowl of warm soapy water for 30 minutes.
Step 6: Rub the paper off with your thumb until there is only black toner traces left.
Step 7: Mix an etchant solution using 2 parts Hydrogen Peroxide with 1 part Muriatic Acid. BE CAREFUL and wear gloves and safety goggles. This will take about 10 minutes.
Step 8: Drill all holes (preferrably with a drill press).
Step 9: Place components and solder. Solder Mosfets last.
Image Gallery